JenkinsPipeline+SonarQube+Python集成钉钉自动通知(webhook版)
一、前言
SonarQube 最需要的功能之一是能够在质量未达到预期水平时使通知或构建失败。我们知道在 SonarQube 中具有质量阀的内置概念,在上文我们是试图通过在主动等待其执行结束来获取扫描结果功能。但该解决方案并不是最好的,这意味着Jenkins 将等待忙碌,并且必须这个时间可控。
实现此目的的最简单的模式是释放 Jenkins 执行程序,并在执行完成时让 SonarQube 发送通知。然后,将恢复 Jenkins 作业,并采取适当的措施(不仅将作业标记为失败,而且还可以发送通知)。
由于自 SonarQube 6.2 后引入的 webhook 功能,所有这些现在都可以实现。我们可以利用Jenkins Pipeline 功能,该功能允许在不占用执行程序的情况下执行作业逻辑的某些部分。
让我们来看看它是怎么实现的。
二、准备工作
- Jenkins、SonarQube 服务已经搭建完成
- Jenkins 安装 sonar插件SonarQube Scanner for Jenkins
- 版本:Jenkins 2.164.3,SonarQube 7.4
三、配置
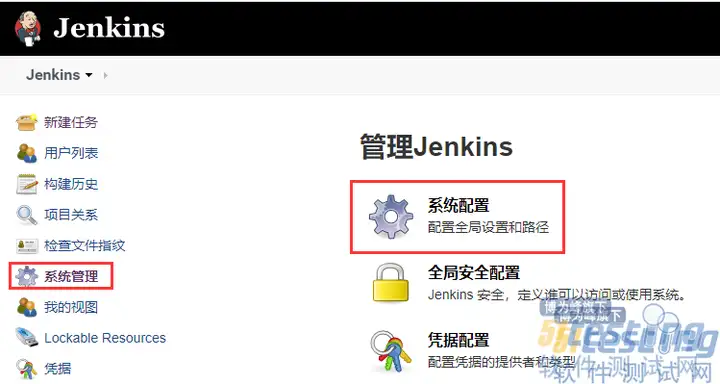
具体步骤如下: (1)Jenkins 配置 SonarQube 插件
(2)SonarQube 设置 webhook,不同的代码规模的项目,分析过程的耗时是不一样的。所以当分析完成后,由 SonarQube 主动通知 Jenkins。 设置方法:进入 SonarQube Administration -> 配置 -> 网络调用
四、使用Pipeline构建
1、Pipeline的介绍
Pipeline 也就是构建流水线,对于我们来说,最好的解释是:使用代码来控制项目的构建、测试、部署等。 使用它的好处有很多,包括但不限于:
- 使用 Pipeline 可以非常灵活地控制整个构建过程
- 可以清楚地知道每个阶段使用的时间,方便优化
- 构建出错,使用 stageView 可以快速定位出错的阶段
- 一个 job 可以搞定整个构建,方便管理和维护等
2、新建Pipeline项目
建一个 Pipeline 项目,写入 Pipeline 的构建脚本,就像下面这样
3、job UI 界面(参数化构建)
在配置 job 的时候,选择参数化构建过程,传入项目仓库地址、分支、等等。还可以增加更多的参数 ,这些参数的特点是,可能需要经常修改,比如灵活选择构建的代码分支。
4、Pipeline脚本
SonarQube 提供了可以使用两个 SonarQube 关键字withSonarQubeEnv和waitForQualityGate来配置管道作业。在 Jenkins 全局配置中配置的连接详细信息将自动传递到扫描器。
如果你的 credentialId 不想使用全局配置中定义的那个,则可以覆盖。
以下是每个扫描器的一些示例,假设在 linux 务器上运行,并且已配置名为 My SonarQube Server 的服务器以及必需的扫描工具。如果在Windows服务器上运行,则只需替换 sh 为 bat。
分析 .NET 项目声明式脚本:
pipeline {
    agent any//变量定义environment {
        _workspace ="${env.WORKSPACE}"_projectName ="${env.JOB_NAME}"_BUILD_NUMBER ="${env.BUILD_NUMBER}"_ScannerMsBuildHome ="C:\\Users\\htsd\\Downloads\\sonar-scanner-msbuild-4.6.1.2049-net46"_MSBuildHome ="C:\\Program Files (x86)\\Microsoft Visual Studio\\2017\\Enterprise\\MSBuild\\15.0\\Bin\\amd64"}

    stages {
        stage(Checkout Code){//从git仓库中检出代码steps {
      git branch:"${BRANCH}",credentialsId:40c624a3-b7c6-4b51-830b-2295edc3ffbd, url:"${REPO_URL}"}
    }

        stage(Build & SonarQube analysis) {
            steps{
                withSonarQubeEnv(SonarQube7.4) {// Due to SONARMSBRU-307 value of sonar.host.url and credentials should be passed on command lineecho"_ScannerMsBuildHome:${_ScannerMsBuildHome}"echo"_MSBuildHome:${_MSBuildHome}"bat"${_ScannerMsBuildHome}\\SonarScanner.MSBuild.exe begin /k:${_projectName}/n:${_projectName}/v:${_BUILD_NUMBER}/d:sonar.host.url=%SONAR_HOST_URL% /d:sonar.login=%SONAR_AUTH_TOKEN% /d:sonar.scm.provider=True"bat"\"${_MSBuildHome}\\MSBuild.exe\" Project.sln /t:Rebuild"bat"${_ScannerMsBuildHome}\\SonarScanner.MSBuild.exe end /d:sonar.login=%SONAR_AUTH_TOKEN%"}// SonarQube taskId自动附加到pipeline上下文}
        }// 不需要占用节点stage("Quality Gate") {
            steps{
                  timeout(time:1, unit:HOURS) {// 万一发生错误,pipeline 将在超时后被终止waitForQualityGate abortPipeline:true// 告诉 Jenkins 等待 SonarQube 返回的分析结果。当 abortPipeline=true,表示质量不合格,将 pipeline 状态设置为 UNSTABLE。}
            }
        }
    }

    post {
        always {//发送钉钉通知echoDingtalk Notificationbat"python D:\\WorkSpace-new\\pipline\\VBI-notification.py"}
    }
}
参数解释:
sonar.projectKey:项目key (必填项)
sonar.projectName:项目名称(必填项)
sonar.projectVersion:项目版本(必填项)
sonar.sources:源码位置(相对路径)
sonar.java.binaries:编译后的class位置(必填项,相对路径同上)
sonar.exclusions:排除的扫描的文件路径
sonar.host.url:SonarQube 地址
sonar.login:SonarQube生成的token
命令行分析其他项目声明式脚本 :
pipeline {
    agent any

    environment {
        _workspace ="${env.WORKSPACE}"_projectName ="${env.JOB_NAME}"_BUILD_NUMBER ="${env.BUILD_NUMBER}"_scannerHome ="C:\\sonar-scanner-cli-3.3.0.1492-windows\\sonar-scanner-3.3.0.1492-windows\\bin"}

    stages {
        stage(Checkout Code){//从git仓库中检出代码steps {
      git branch:"${BRANCH}",credentialsId:40c624a3-b7c6-4b51-830b-2295edc3ffbd, url:"${REPO_URL}"}
    }
        stage(SonarQube analysis) {
            steps{

                withSonarQubeEnv(SonarQube7.4) {// Due to SONARMSBRU-307 value of sonar.host.url and credentials should be passed on command lineecho"_scannerHome:${_scannerHome}"bat"${_scannerHome}\\sonar-scanner.bat -Dsonar.projectName=${_projectName}-Dsonar.sources=. -Dsonar.projectKey=${_projectName}-Dsonar.projectVersion=${_BUILD_NUMBER}-Dsonar.login=%SONAR_AUTH_TOKEN% -Dsonar.scm.provider=True"}// SonarQube taskId 自动附加到 pipeline 上下文}
        }// 不需要占用节点stage("Quality Gate") {
            steps{
                  timeout(time:1, unit:HOURS) {// 万一发生错误,pipeline 将在超时后被终止waitForQualityGate abortPipeline:true// 告诉 Jenkins 等待 SonarQube 返回的分析结果。当abortPipeline=true,表示质量不合格,将pipeline状态设置为UNSTABLE。}
            }
        }
    }

    post {
        always {//发送钉钉通知echoDingtalk Notificationbat"python D:\\WorkSpace-new\\pipline\\VBI-notification.py"}
    }
}
一些官方的示例:
SonarScanner for MSBuild:
node {
  stage(SCM) {
    githttps://github.com/foo/bar.git}
  stage(Build + SonarQube analysis) {
    def sqScannerMsBuildHome = toolScanner for MSBuild 4.6withSonarQubeEnv(My SonarQube Server) {
      bat"${sqScannerMsBuildHome}\\SonarQube.Scanner.MSBuild.exe begin /k:myKey"batMSBuild.exe /t:Rebuildbat"${sqScannerMsBuildHome}\\SonarQube.Scanner.MSBuild.exe end"}
  }
}
SonarScanner:
node {
  stage(SCM) {
    githttps://github.com/foo/bar.git}
  stage(SonarQube analysis) {
    def scannerHome = toolSonarScanner 4.0;
    withSonarQubeEnv(My SonarQube Server) {// If you have configured more than one global server connection, you can specify its namesh"${scannerHome}/bin/sonar-scanner"}
  }
}
SonarScanner for Gradle:
node {
  stage(SCM) {
    githttps://github.com/foo/bar.git}
  stage(SonarQube analysis) {
    withSonarQubeEnv() {// Will pick the global server connection you have configuredsh./gradlew sonarqube}
  }
}
SonarScanner for Maven:
node {
  stage(SCM) {
    githttps://github.com/foo/bar.git}
  stage(SonarQube analysis) {
    withSonarQubeEnv(credentialsId:f225455e-ea59-40fa-8af7-08176e86507a, installationName:My SonarQube Server) {// You can override the credential to be usedshmvn org.sonarsource.scanner.maven:sonar-maven-plugin:3.6.0.1398:sonar}
  }
}
暂停job,直到计算出质量阀状态:
node {
  stage(SCM) {
    githttps://github.com/foo/bar.git}
  stage(SonarQube analysis) {
    withSonarQubeEnv(My SonarQube Server) {
      shmvn clean package sonar:sonar}// submitted SonarQube taskId is automatically attached to the pipeline context}
}// No need to occupy a nodestage("Quality Gate"){
  timeout(time:1, unit:HOURS) {// Just in case something goes wrong, pipeline will be killed after a timeoutdef qg = waitForQualityGate()// Reuse taskId previously collected by withSonarQubeEnvif(qg.status !=OK) {
      error"Pipeline aborted due to quality gate failure:${qg.status}"}
  }
}
声明式脚本:
pipeline {
    agent any
    stages {
        stage(SCM) {
            steps {
                git url:https://github.com/foo/bar.git}
        }
        stage(build&& SonarQube analysis) {
            steps {
                withSonarQubeEnv(MySonarQube Server) {// Optionally use a Maven environment youve configured alreadywithMaven(maven:Maven3.5) {
                        shmvnclean package sonar:sonar
                    }
                }
            }
        }
        stage("Quality Gate") {
            steps {
                timeout(time:1, unit:HOURS) {// Parameter indicates whether to set pipeline to UNSTABLE if Quality Gate fails// true = set pipeline to UNSTABLE, false = dontwaitForQualityGate abortPipeline:true}
            }
        }
    }
}
如果要在同一 job 中运行多个分析并使用waitForQualityGate,则必须按顺序进行所有操作: 声明式脚本:
pipeline{agentanystages{stage(SonarQubeanalysis 1) {steps{shmvn clean package sonar:sonar}}stage("QualityGate 1") {steps{waitForQualityGateabortPipeline: true}}stage(SonarQubeanalysis 2) {steps{shgradle sonarqube}}stage("QualityGate 2") {steps{waitForQualityGateabortPipeline: true}}}}5、钉钉通知
5.1、依赖包
pip3install configparserpip3install DingtalkChatbotpip3install requestspip3install python-jenkinspip3install json2625.2、脚本
coding=utf-8@author: zuozewei
@file: notification.py
@time: 2019/5/10 18:00
@description:dingTalk通知类importosimportjenkinsimportconfigparserimportrequestsimportjsonimporttimefromdingtalkchatbot.chatbotimportDingtalkChatbotfromjsonpathimportjsonpath获取Jenkins变量JOB_NAME = str(os.getenv("JOB_NAME"))
BUILD_URL = str(os.getenv("BUILD_URL")) +"console"BUILD_NUMBER = str(os.getenv("BUILD_NUMBER"))连接jenkinsserver = jenkins.Jenkins(url="http://xxx.xxx.xxx.xxxx:8080", username=xxxx, password="xxxx")defsonarNotification():bug =leak =code_smell =coverage =density =status =title =xxxx代码扫描通知dingText =SonarQube_URL =http://xxx.xxx.xxx.xxxx:9088/dashboard?id=+ JOB_NAMEsonar APIsonar_Url =http://xxx.xxx.xxx.xxxx:9088/api/measures/search?projectKeys=+ JOB_NAME + \&metricKeys=alert_status%2Cbugs%2Creliability_rating%2Cvulnerabilities%2Csecurity_rating%2Ccode_smells%2Csqale_rating%2Cduplicated_lines_density%2Ccoverage%2Cncloc%2Cncloc_language_distribution获取sonar指定项目结果resopnse = requests.get(sonar_Url).text转换成josnresult = json.loads(resopnse)解析sonar json结果foriteminresult[measures]:ifitem[metric] =="bugs":
            bug = item[value]elifitem[metric] =="vulnerabilities":
            leak = item[value]elifitem[metric] ==code_smells:
            code_smell = item[value]elifitem[metric] ==coverage:
            coverage = item[value]elifitem[metric] ==duplicated_lines_density:
            density = item[value]elifitem[metric] ==alert_status:
            status = item[value]
            print(【Status】:+ status)else:passtextFail =+ JOB_NAME +- CodeScan+ BUILD_NUMBER +\n+ \新代码质量:+ status + \n+ \**版本类型**:+开发版+\n+ \**Bug数**:+ bug +个 \n+ \**漏洞数**:+ leak +个 \n+ \**可能存在问题代码**:+ code_smell +行 \n+ \**覆盖率**:+ coverage +% \n+ \**重复率**:+ density +% \n+ \**SonarQube**:  [查看详情](+ SonarQube_URL +) \n+ \**关注人**: @158xxxx3364 \n+ \>  xxxx技术团队 \ntextSuccess =+ JOB_NAME +- CodeScan+ BUILD_NUMBER +\n+ \**新代码质量**:+ status +\n+ \**版本类型**:+开发版+\n+ \**Bug数**:+ bug +个 \n+ \**漏洞数**:+ leak +个 \n+ \**可能存在问题代码**:+ code_smell +行 \n+ \**覆盖率**:+ coverage +% \n+ \**重复率**:+ density +% \n+ \**SonarQube**:  [查看详情](+ SonarQube_URL +) \n+ \>  xxxx技术团队 \n判断新代码质量阀状态ifstatus ==ERROR:
        dingText = textFailelifstatus ==OK:
        dingText = textSuccess

    sendding(title, dingText)defsendding(title, content):at_mobiles = [186xxxx2487,158xxxx3364]
    Dingtalk_access_token =https://oapi.dingtalk.com/robot/send?access_token=xxxxxxxxxx初始化机器人小丁xiaoding = DingtalkChatbot(Dingtalk_access_token)Markdown消息@指定用户xiaoding.send_markdown(title=title, text=content, at_mobiles=at_mobiles)if__name__ =="__main__":
    sonarNotification()
5.3、通知效果
五、小结
我们也可以把一个 Pipeline 构建做成 Jenkinsfile 通过git管理,带来的好处如下:
- 方便多个人维护构建CI,避免代码被覆盖
- 方便构建 job 的版本管理,比如要修复某个已经发布的版本,可以很方便切换到发布版本时候用的 Pipeline 脚本版本
当然,Pipeline也存在一些弊端,比如:
- 语法不够友好,但好在 Jenkins 提供了一个比较强大的帮助工具(Pipeline Syntax),可以结合 vscode ide进行开发
- 代码测试繁琐,没有本地运行环境,每次测试都需要提交运行一个 job,等等
相关代码:
- https://github.com/zuozewei/blog-example/tree/master/Jenkins-ci/pipeline-sonarqube-python-dingtalk-notifications-webhook
参考资料:
- [1]: https://docs.sonarqube.org/latest/analysis/scan/sonarscanner-for-jenkins
- [2]: Jenkins的Pipeline脚本在美团餐饮SaaS中的实践